Coilover Install!
Welcome to the install portion of the coilover install article. I pretty much used this video, Subiespeed Install and this video from Stillen as a guide.
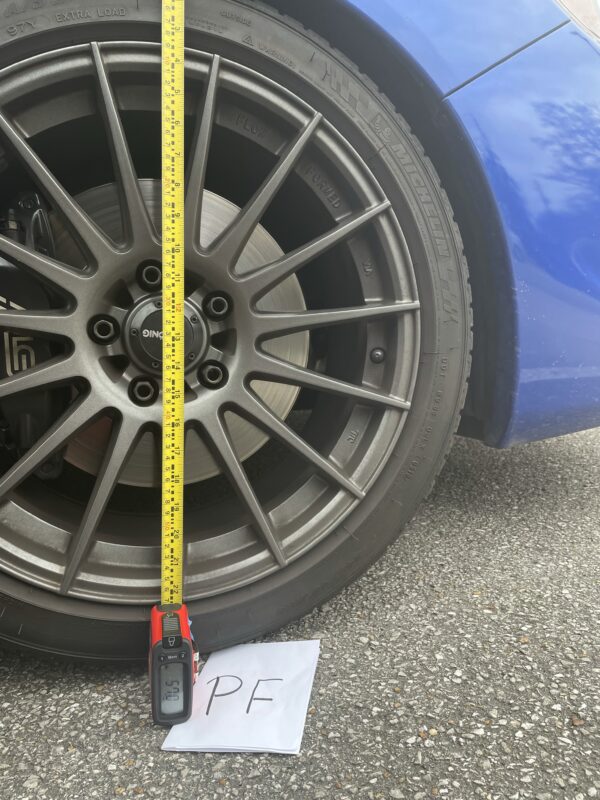
Before you begin! Take pictures and measurements at each wheel. Measure with the tape measure on the ground, pull center of the center cap to the apex of the fender, lock the tape measure and take the reading. Remember that you’ll need to add the length of the tape measure to your final reading (my tape measure is 3″ or 7.62cm). Stillen does it like this. I also used a spreadsheet to track ride height adjustment, view it here.
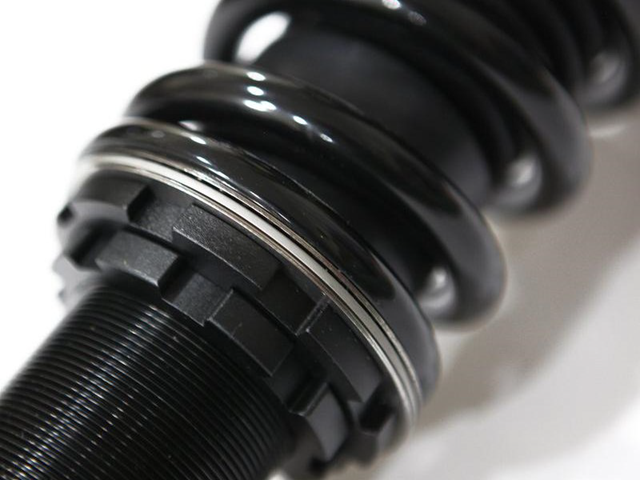
Do PRELOAD! The WRX has a different suspension in front versus the back. They both require different preload. According to Fortune Auto, the standard for this model, preload should be .25 inch for the front and .15 for the rear. Measure the spring length, probably 7 inches, install the spring, tighten and measure till the shock is at the appropriate lenght (6 3/4 front and 6 7/8 rear).
Tracking your adjustments and heights by spreadsheet is key here.
Tools Required:
- Long breaker bar
- Socket wrench
- 12mm socket
- 19mm socket and closed end wrench
- 17mm socket and closed end wrench
- 14mm socket
- (Optional) 10mm socket for STi light level bracket on LCA
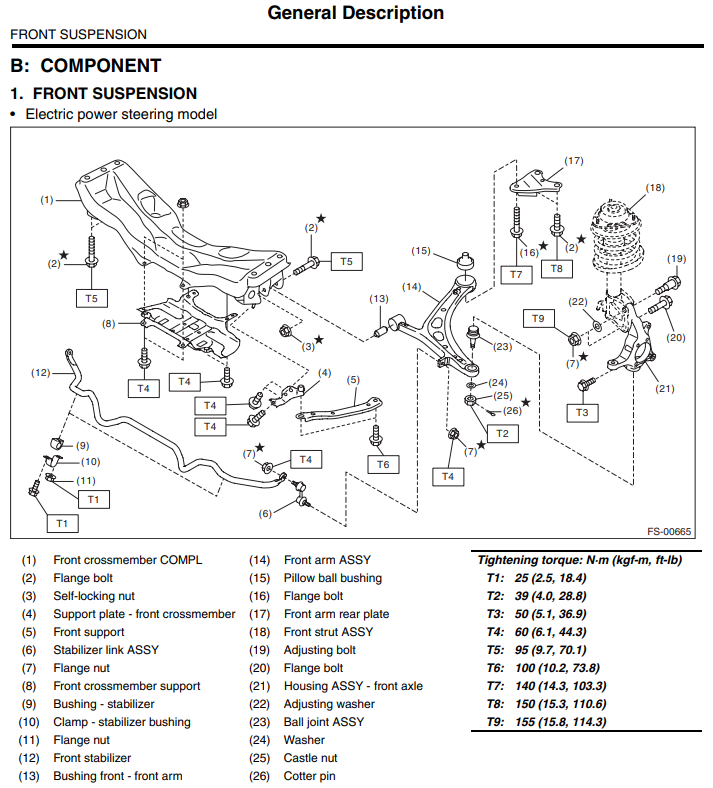
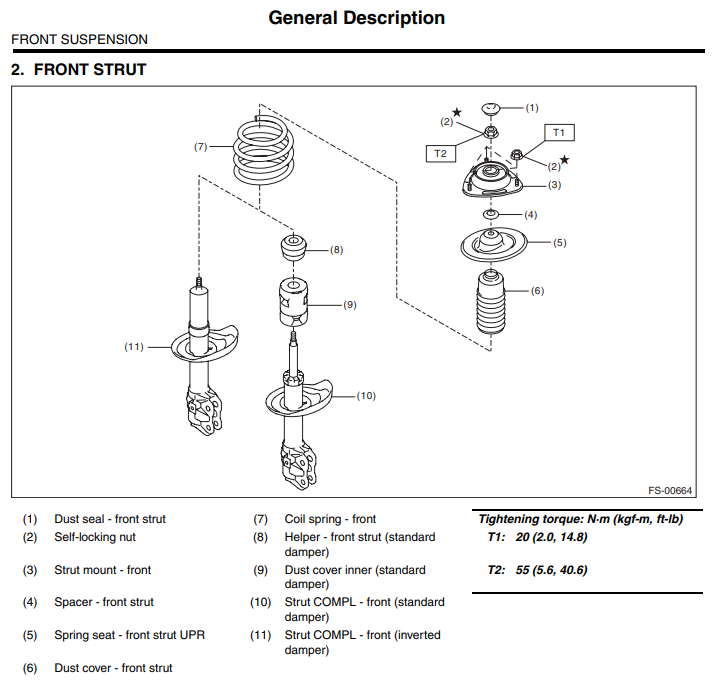
Torque Specs (Front):
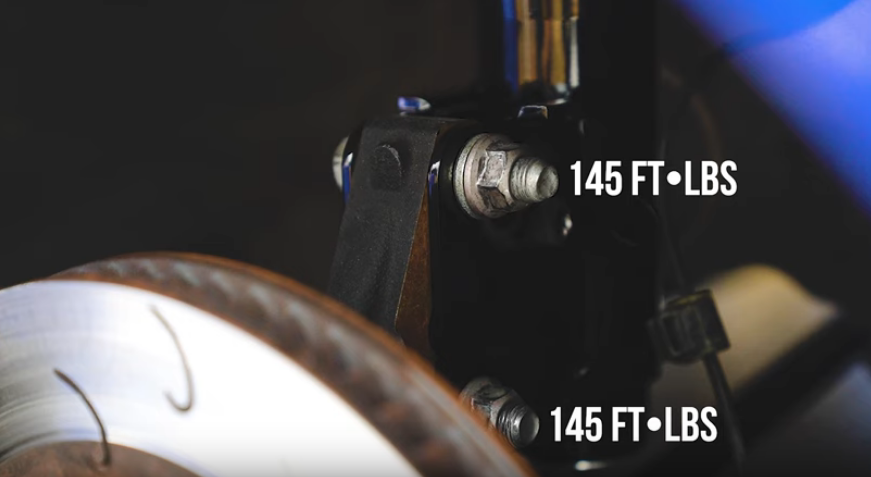
- Lower strut to steering knuckle – 114ft-lbs (T9), uses 19mm for both bolts, 12mm for brake line bracket
- Top strut mount nuts – 14.5ft-lbs (note 14 not 145!), uses 12mm
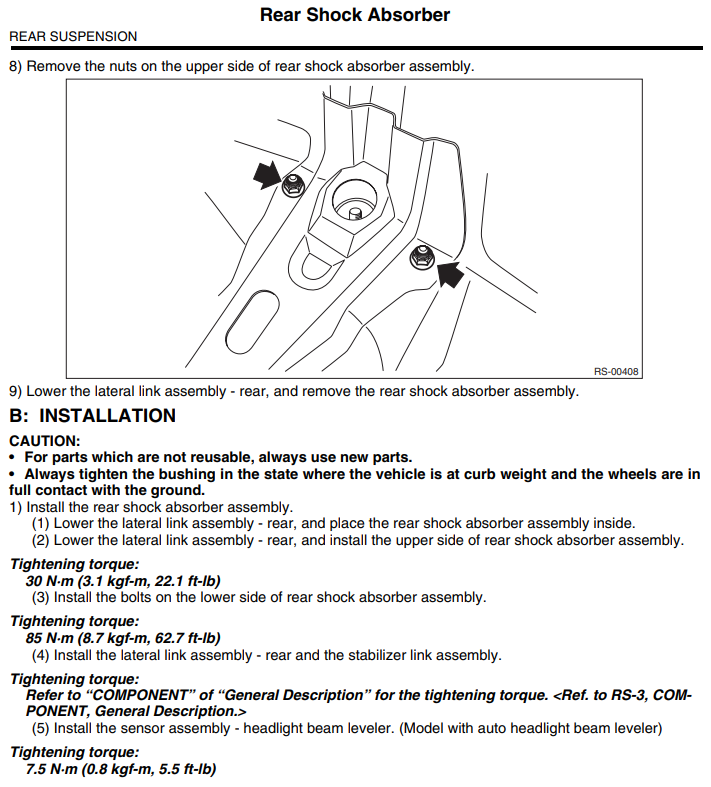
Torque Specs (Rear):
- LCA inboard and outboard – 59ft-lbs, uses 17mm
- End link – 28ft-lbs, uses 17mm
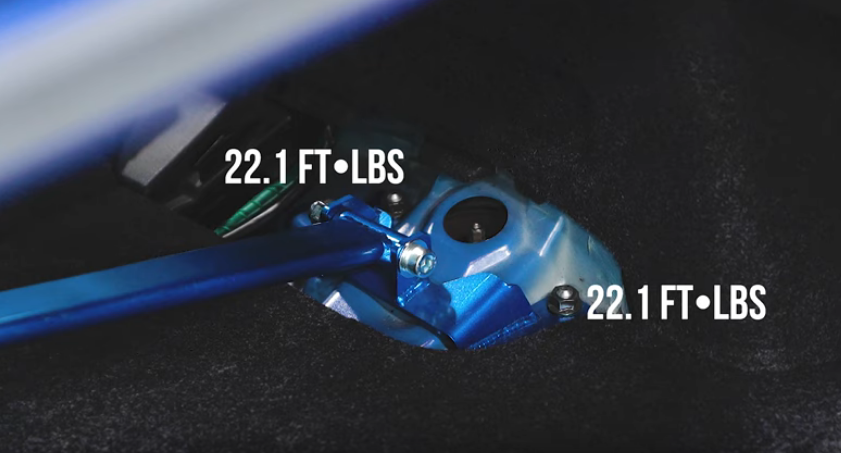
- Top strut mount nuts – 22.1ft-lbs, uses 14mm
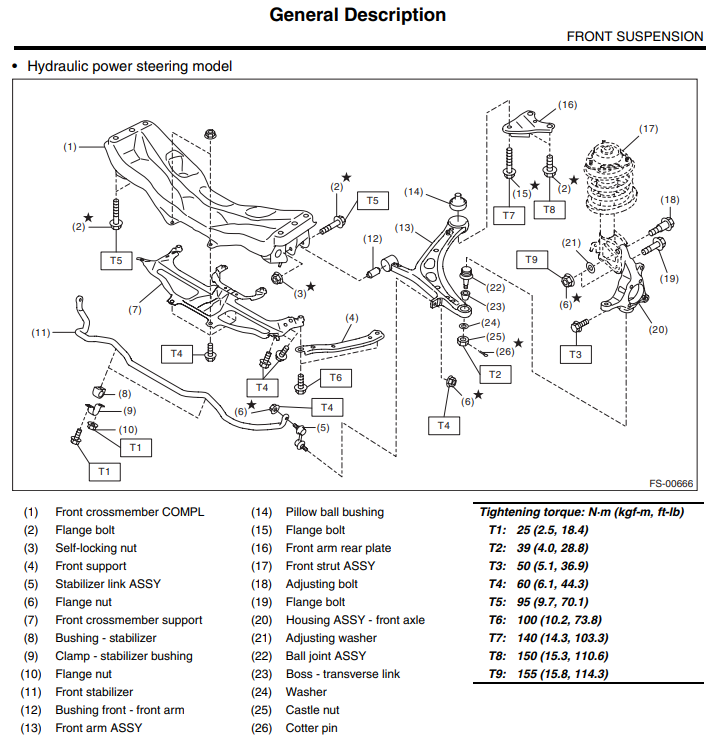
Quick notes about torques… the values listed in the video appear to be too high. According to the manual excerpts, particularly for the rear assembly, use:
LCA to Housing (T4) = 59ft-lbs
Shock to LCA (T5) = 62.7ft-lbs
End link to LCA (T2) = 28ft-lbs
LCA to Subframe (T4) = 59ft-lbs
or front, lower strut to steering knuckle (T9) – 114ft-lbs!
Wheel lug nuts – 85 ft-lbs
After raising the car and removing the wheels begin with the front.
Front Struts (19mm and 12mm tools):
- Take picture of strut assembly with note of the direction to the front of the car both upper and lower
- Remove the abs sensor wire and brake hose by pinching the locking clip ABS bracket clip and then use a 12mm bolt
- Per Stillen video, undo the front sway bar end link from the suspension, leaving it attached to the sway bar. This removes preload from the suspension (optional, I ended up not needing to do this)
- Remove the lower bolts of the strut using a 19mm set, prop up steering arm with a jack/jack stand
- Remove the three 12mm nuts off of the strut mount at the top, remove two first and loosen the third, removing it while you have a hand on the strut so that it won’t fall and damage things
- Carefully remove the strut with attention to the ABS wire and brake line
- Install is reverse of removal
- Note that the top, lower bolt has both a washer and is the lobed, camber bolt. Rotate so that there is no camber on the bolt
- Torque lower bolts and the upper strut mount bolts as well
- Reinstall ABS clip wire and brake line with 12mm
Rear Struts (17mm and 14mm tools):
- Take pictures of the assembly as well as pictures of the trunk prior to the next step
- Remove the trunk lining carpet from inside the trunk to expose the upper strut bolts, that’s 3 plastic clips in the middle and then 5 clips each side
- Loosen then remove the end link, lower strut bolt and inboard lower control arm bolt from the lower control arm (LCA). If removing the LCA, remove the last bolt from the LCA and remove the LCA from the assembly. Also depending on the side, remove the light level bracket with 10mm
- Remove the upper strut bolts while someone/jack holds the strut in place so that it doesn’t fall. Watch for lines and wires.
- Insert new strut into place and secure with the top two 14mm bolts loosely, do not snug/tighten
- Install or reposition the LCA back into place so that both ends have their bolt inserted and tightened, not torqued. NOTE use the lower of the two bolt holes on the new LCA’s when connecting to the outer wheel assembly.
- Using a jack, press under the LCA to get the lower strut positioned such that you can insert a bolt through, same for the sway bar end link♣. For the shock, some light tapping with a rubber mallet may be required.
- See if there is an allocation for the headlight alignment bracket
- Torque all bolts into place
Swaybar End Link Adjustment (optional):
♣ Installing my end links the first time, I believe the lengths, while close were not perfect. This is the correct method of adjustment per SuperPro. Once the car is on the ground/ramps (not stands) so that the weight of the car is on the suspension, adjust the first link so that the bar is level, then set the other link such that it just falls in place and can be bolted up. Again, watch the pro on the video.
Height Adjustment:
Once the rear sway bar end links have been adjusted using ramps, lower the car and begin the final height adjustments. Based on Stillen’s video, base height when on the ground to the apex of the fender is ~26.5″ or 67.5cm. In their video the RS-R coilovers give a drop of 1.4″ so his number is 25 3/16″. For the Silver Neomax, I had confirmed it is a minimum of a 10mm (or 0.4″) drop. We should be looking for ~66.5cm in the front. Again, Stillen says the rears are at stock 27″ (68.58cm), in his example the final rear ride height with a 1.4 is 25 9/16″.
By my reading, using my red tape measure which is ~3″ (7.62cm), a front of 59.8cm + 7.62 = 67.42cm. After install of a 10mm drop, the front reading should be 58.8cm. So a rear ride of 68.58-7.62=60.96cm on the tape and after a 10mm drop, should be 59.96cm.
BTW, this calculator is great at converting goofy fractions to decimals or metric measurements.
Finally step, go get it pro aligned. Remember to bring your specs with you!
Oh and one more thing, manual says after an alignment…
When the wheel alignment has been adjusted, perform “VDC sensor midpoint setting mode” of the VDC. <Ref. to VDC-16, ADJUSTMENT, VDC Control Module and Hydraulic Control Unit (VDCCM&H/U).> —- And it was
7) Perform reinitialization of the auto headlight beam leveler system. (Model with auto headlight beam leveler) <Ref. to LI-17, REINITIALIZATION, PROCEDURE, Auto Headlight Beam Leveler System.>