Rear toe on the WRX STi (VA) chassis is said to be far to negative.
Removal and install is pretty straight forward. You will need:
- Ball join separator
- 22mm box end wrench
- 19mm socket (1/2 preferred)
- 17mm socket
- 19mm box end wrench
- Pliers for hitch cotter pin removal
- 12mm socket for cable assembly nut removal
- 1/2″ socket wrench
- 3/8″ socket wrench
- torque wrench
Torque Spec
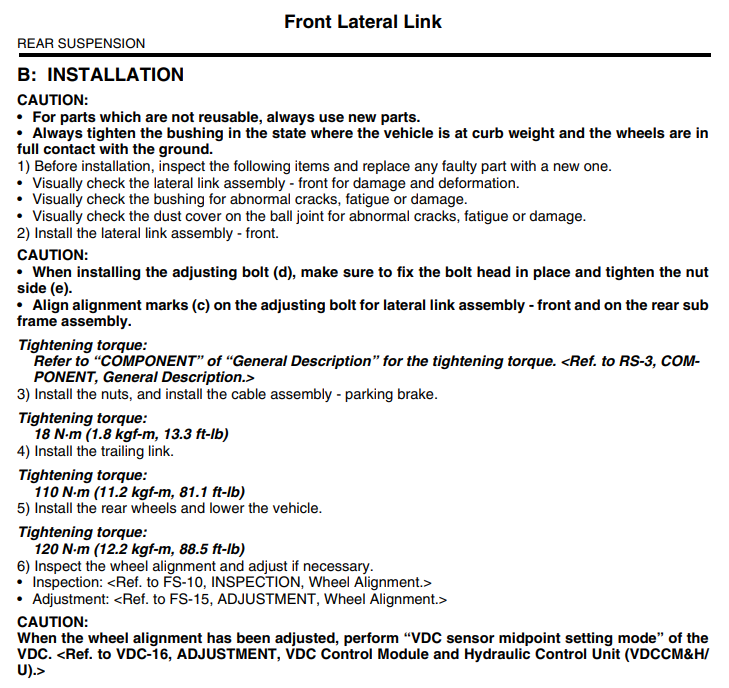
- 81 ft-lbs both ends (if you are strong willed enough)
Removal
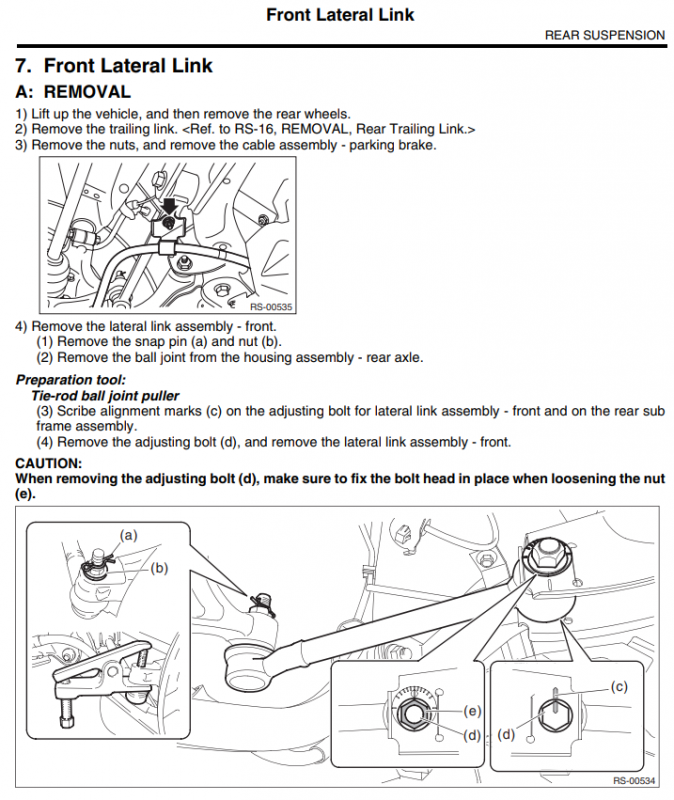
Procedure, using the manual excerpts below, mark where the lobed, inboard bolt is. Note that this bolt has a split seam and has a special washer behind the 19mm nut. Once the nut is loosened and removed, remove this special washer by hand else the bolt will not want to come out. BE GENTLE. The lobed nut should be pressed out by hand While you are there, remove the 12mm nut holding the brake cable to the arm.
Next, remove the hitch cotter pin and remove the 17mm nut. Use the ball join separator to pop the arm from the housing assembly. Remove the arm.
Installation
I preferred placing the threaded portion of the arm into the housing assembly and barely put on the securing nut. Then I pressed the other end into the inboard subframe and began putting the lobe nut back into place, followed by the special washer and 19mm nut. Line things up and begin to tighten but not to torque. Keep the bolt from turning since it is lobed and will move things out of alignment, though, you are going to need an alignment. While you are there, if your toe arm has an allocation for the parking cable, reaffix the parking cable with the 12mm nut.
Finish tightening both ends of the arm finally bring them to the proper torque. Read the directions from the manual excerpt! Final torque should be applied when all four tires are on the ground and at load. Torque specification is 81ft-lbs however, that seems to be too much as I felt that the bolts were going to shear. 76ft-lbs with the +/- range of the torque wrench used, may be sufficient.


