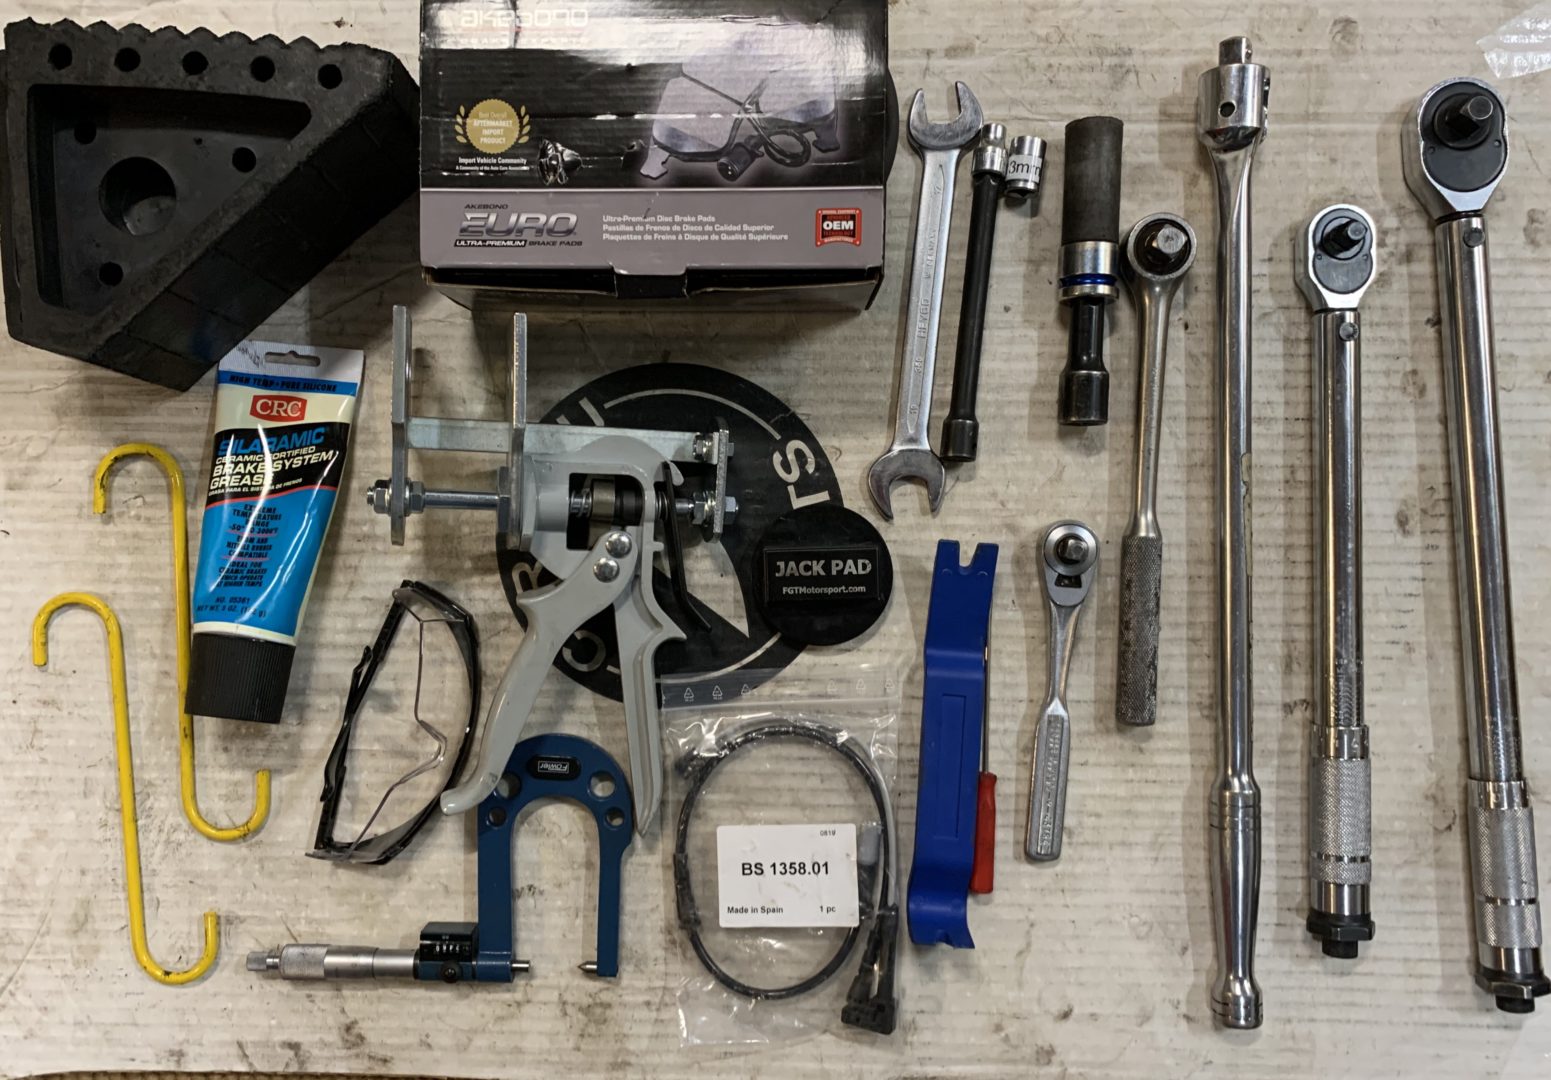
To change the brake pads on an F60 Mini Cooper Countryman, you are going to need these tools (jack with pad not pictured):

Secondly, look everything up using the newtis so that you know the torque spec and disassembly instructions.
Torque Specs:
Wheel Lugs – 140Nm (103.25Ft-Lb)
Guide Screws (hex bolts) – 35Nm (25.81Ft-Lb)
Use the following procedure to replace the brake pads. Do one side first and then follow up with the second side. I recommend starting with the passenger side since it is the least complicated and fastest. The driver side will require the replacement of the brake sensor wire.
Procedure (Passenger Side):
- Chock rear wheel with wheel chock
- Lightly loosen lugs with 17mm deep socket using a 1/2 breaker bar
- Lift the car using a jack with a jack pad and the BMW/Mini jack adapter raising the wheel off of the ground
- Remove the wheel from the assembly using the 17mm and a 1/2 socket wrench
- Use the 13mm socket with the 3/8 socket wrench AND a 17mm open end wrench to gently loosen the hex bolts holding the caliper to the mounting bracket. See picture
- Press on the caliper toward you to press in the brake piston a bit so that is loose enough to flip up
- Remove the lower hex bolt first
- Suspend the two caliper hooks (yellow in the picture) from the coil spring on the strut
- Remove the upper bolt while maintaining pressure on the caliper as if it is too loose, it may fall off and the brake assembly and stress/tear/fatigue the brake line!
- Remove the brake caliper and suspend it from the caliper hooks so that there is minimal stress to the brake line
NOTE: The brake pads are equipped with spring loaded ears. There is not a retaining pad, clip or spring. Everything is integrated into the pad
- Using a small screwdriver, press the spring loaded ear and pull away from the rotor, this will cause the pad to pop out
- Remove both inner and outer pads noting that the inside of one pad is designed to access the brake sensor. Be consistent and have that pad inboard.
- Take a measurement of the disc rotor and ensure that there is ample rotor for the new pads
- Examine the caliper and the brake piston for wear, clean as necessary, mind not breathing or getting dust in your eyes or on other parts of the brake system
- Crack open the brake reservoir. You may need to peal back some plastic to find it on the driver side toward the rear of the engine bay. Use shop paper towels to surround the reservoir so that any spills will be absorbed
- Compress the brake piston back in using the brake tool
- Using brake grease, lube the seats where the spring loaded ears for each pad will sit
- Insert the brake pads again paying attention to the correct pad for the inboard. Make sure the spring loaded ears seat well
- Using brake grease, gently coat the outside face of each pad lightly with the grease and then apply a tiny amount to the face of the brake piston
- Having the top hex bolt at the ready, remove the caliper from the hooks and gently fit back onto the mounting assembly
- Hold caliper in place while the top hex bolt is fitted to the assembly followed by the lower hex bolt
- Ensure pads and caliper are seated correctly and then begin to tighten the hex bolts using the 13mm socket and 17mm open end wrench
- Once tight, use the 3/8 torque wrench and torque to spec the upper and lower hex bolts
- Mount the wheel back to the hub and hand tighten the lugs
- Lower the car using the jack
- Torque wheel lugs to specified torque
Driver Side:
- After jacking and removing the wheel, begin by removing the clips of the fender liner using the blue plastic clip removal tool and the 8mm socket for that one screw.
- Carefully reach behind the fender liner and remove the electrical connector for the brake sensor wire. Carefully pinch down and remove the brake sensor wire from its connector
- Further remove the brake sensor wire from the strut assembly. Note how the wire is routed. This is best by taking a picture of the assembly prior to removing the wire
- The brake sensor wire should be free and unplugged from everything except the brake pad. This brake sensor wire will not be reused
Remove and replace the brake pads as noted using the procedure above…
Once the assembly is reassembled and torqued
- Route the new brake sensor wire connecting it first to the strut assembly
- Clip the brake sensor wire into the new inboard pad
- Connect the brake sensor wire to the electrical connector and reseat in the clip provided
- Button the fender liner back up ensuring that the brake sensor will is free and not crimped by the fender liner, replace and snap in the clips and reinstall the screw using the 8mm socket careful to not over-torque and strip
- With everything reinstalled, mount the wheel as described above
- Lower car
- Torque wheel lugs
When the task is completed, check the brake fluid level, add fluid if necessary so that the reservoir level is at the max line, secure the lid, put fascia back down and close the hood. Start the car and slowly press the brake pedal over and over so that it gains pressure. Remove the wheel chock and take a test drive allowing greater stopping distance as braking distances are increase as the pads begin to seat. Refrain from high speed or abrupt stops during the test.

